Guides › Disc Brake Pad Replacement
Disc Brake Pad Replacement
⚠️ Educational only — follow your service manual, use rated jack stands, and read our safety rules before you start.
Replace front or rear disc brake pads on a typical car or light truck, with the safety steps people skip.
⚠️ Safety first
- NEVER work under or remove a wheel from a car held only by a jack. Use rated jack stands on solid, level ground and chock the opposite wheels.
- Brake dust may contain harmful material — don't blow it with compressed air; use brake cleaner and a wet wipe.
- Brake work is safety-critical. If you're not sure it's right, don't drive it.
- Pump the pedal several times before moving the car — the first press after compressing pistons goes to the floor.
Tools & supplies
- Floor jack + rated jack stands
- Lug wrench / torque wrench
- Socket set
- C-clamp or piston tool
- Brake cleaner
- Brake grease
- Wheel chocks
🧰 Tools & parts needed / Recommended gear
Disclosure: links below are paid Amazon search links; as an Amazon Associate we earn from qualifying purchases, at no cost to you. Learn more.
- Floor jack — Lifts the vehicle safely to the correct jack point. ⚠️ A jack is for lifting only — never work under a vehicle on a jack alone. view options (paid link)
- Jack stands (pair) — Supports the vehicle while the wheel is off. ⚠️ Use rated stands on level, solid ground; chock the opposite wheels. view options (paid link)
- Torque wrench — Torques lug nuts and caliper bolts to spec. view options (paid link)
- Brake caliper piston tool — Retracts pistons evenly (rear screw-in pistons need a wind-back tool). view options (paid link)
- Brake cleaner — Removes dust and grease from rotors and hardware. ⚠️ Use outdoors; don't breathe brake dust or spray near flames. view options (paid link)
- Brake caliper grease — Lubes slide pins and contact points to stop squeal. ⚠️ Keep grease off pad friction surfaces and rotors. view options (paid link)
- Nitrile gloves — Keeps brake dust and fluid off skin. view options (paid link)
Steps
- Loosen lug nuts slightly while the wheel is on the ground, then lift and set the vehicle on jack stands at manufacturer lift points.
- Remove the wheel. Inspect pad thickness, rotor surface, and hoses before disassembly; take a photo for reference.
- Remove caliper slide bolts and hang the caliper with wire — never let it dangle by the hose.
- Remove old pads and hardware clips. Measure rotor thickness against the minimum stamped on it; replace or resurface if below spec or deeply grooved.
- Slowly compress the piston (open the bleeder or watch the master cylinder so fluid doesn't overflow). Rear pistons on some cars must be screwed in, not pushed.
- Clean the bracket, install new clips, lightly grease contact points (not friction surfaces), and fit new pads.
- Reinstall caliper and torque bolts to spec. Mount wheel and torque lugs in a star pattern to spec.
- Pump the pedal until firm, check fluid level, then bed in the pads per the pad maker's instructions with several moderate stops.
🛑 When to call a pro
- Pedal is soft or sinks after the job (possible air or a leak).
- Fluid leaks from a caliper or hose.
- ABS light comes on, or the car pulls hard to one side.
Printable checklist
WrenchReady — Disc Brake Pad Replacement · Date: ________ Vehicle: ________________
Video walkthroughs
Third-party videos embedded from YouTube; not produced or endorsed by us. Always follow your service manual.
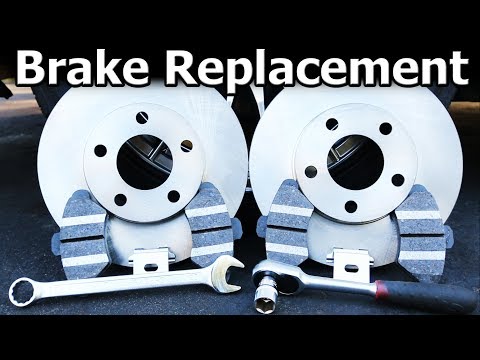
FAQ
How long does it take to replace brake pads?
Plan on roughly 1–2 hours per axle for a typical car or light truck if you have the right tools. Allow extra time the first time you do it.
Why does the brake pedal go to the floor after replacing pads?
Compressing the caliper pistons leaves a gap, so the first press after the job can go to the floor. Pump the pedal until it is firm before moving the vehicle. If it stays soft or sinks, don't drive it — that can mean air or a leak, and a professional should inspect it.
Do I need to replace the rotors too?
Measure rotor thickness against the minimum stamped on the rotor. Replace or resurface rotors that are below spec or deeply grooved; follow your service manual.
Do new brake pads need to be bedded in?
Yes. Follow the pad maker's bed-in instructions, which typically involve several moderate stops. Re-check lug nut torque after about 50 miles.
Related guides
Seasonal Car & Truck Maintenance Checklist
A printable spring/fall walk-around for cars and light trucks that catches problems early.
Beginner · 45 minchecklistMotorcycle Spring Recommissioning (T-CLOCS Style)
Bring a bike out of storage safely: tires, controls, lights, oil, chassis, stands.
Beginner · 45–60 minReferences
- NHTSA: Check for Recalls — NHTSA
Written by the WrenchReady team from general public knowledge. Specifications vary — your owner's/service manual is the authority.